Friday, June 29, 2012

Another Thursday night Flames of War Game

We played another game of Flames of War, yesterday, using Craig's and Dave's miniatures. Brent had taken Alex to the coast for a meeting, so he showed up quite late and Dave had a friend who'd gone to the hospital so he showed late and left early, to return at the end to collect his miniatures.

As I am a lazy git, the side I took between the Germans and Americans was whichever side was assigned to the table edge I was sitting next to, so I played Germans. Two blokes I'd not met before, Kyle and Cole, also played as Germans. Ron, Michael, Craig (and later Brent) played the Americans.

The battle was a meeting engagement, somewhere in France. To make things easier, we had no aircraft on either side, just three units for each player.

In the battle report below, my forces are in the lower left of the map, with Ron's across from him, adjacent to Michael, who faced Kyle. Cole and Brent faced each other as well. I did bring my digital camera, but when I tried to take a picture, the fecking thing didn't work (it turned out to be an issue with the battery. I got it working today, but it is a touchy-feely sort of working relationship, where I have to manually push the battery further into the camera to get it to turn on...no double meanings there you dirty minded readers).

 Our initial deployment. I am using Battle Chronicler, again, to give you readers a visual of the battlefield. The table actually looked fairly close to how it is represented here...no jokes about it being a stick figure or what it may be doing.
 Both sides had recon moves, so my platoon of Pumas move out to their best advantage.
 Meanwhile, the tricksy Americans moved a tank-hunter unit forward into the village, taking cover behind the buildings as best as each vehicle could. The recon unit in the far right were a bunch of jeeps.

 We got first turn, so I moved my Pumas up to just within 16" and unloaded 9 dice of machineguns into the mortar team and OIC. Six hits, and five failed saves later (Ron did not have a good night with the dice...5 of those six saves were 1s). The mortar team failed its morale and the survivors ran off the table. The OIC failed his save, but he got a second save at 5+ and made it. I double moved my infantry into the trees and roadway, not knowing that I could not then "Stormtrooper" up to the stone walls on the other side of the road...a rule I was not made aware of last game.

Kyle was able to move his PzIVs forward enough to take some shots on the tank-hunter team, before it deployed, killing a jeep and Greyhound. Our artillery couldn't fire because we were considered as moving for everything during the first turn...and the rest of our forces couldn't see the enemy.

The Americans got a little payback on their first turn. Ron called in some mortars right onto my Puma, knocking out one due to a failed 3+ save. The tank-hunters deployed up to 8" away (special fecking rule) and 3 M10s popped up in the woods along the roadway, with an HMG platoon, which had been riding along as passengers. The M10s fired and missed a Hornet, but knocked out a PzIV. The HMG platoon could not see the German infantry in the wheatfield to their front.
 
 I wanted very much to relieve that US OIC of the fatigue of living, so I moved my Pumas to just outside his assault range and fired 6 dice of MGs at him; for six hits! He made failed three saves at 3+, making 2 more at 5+, but the third at 5+ was failed and he was killed in a hail of bullets. Kyle was able to kill two of the M10s and the third had bogged down on the far side of the woods, so it was essentially out of combat and ultimately bottled out. Our artillery was able to kill a command stand next to their artillery battery.

The American's fired all sorts of things at my infantry, but I lost only a single stand. They moved their infantry forward, almost in a wave, but Brent decided to enter the woods for some reason...I would blame driving fatigue has he had been on the road most of the day.
 Due to starting very late, we did not really have a chance to get in a full game, but we barreled through until the shop was closing. I had never done an assault before, I figured I'd give it a shot. I moved my infantry forward, and between them and the mobile AA, I killed two stands in shooting. Kyle and Cole were able to kill one or two of the HMGs, I don't know for sure as my attention was on my end of the table. Michael rolled very well on his defensive fire, getting six hits, but using his dice, I rolled five saves...he wouldn't let me use his dice for the rest of the turn... :) My assaulting units did five hits and Michael's infantry were wiped out. He did have a artillery spotter, not shown on the map, who retreated to the wheatfield behind him. My other mobile AA was able to take a long shot and kill an HMG stand.
This was pretty much the game. We had eliminated three platoons of the enemy, for three infantry stands, a Puma, and a PzIV...we may have lost a Hornet as well, but I was so focused on my side of the table...and feeling very badly for Ron's just terrible rolls. We kept telling him to switch his dice, but he just kept giving them the finger after each roll...typically a 1.

We discovered a few errors in rules interpretations, but that was a good thing for all of us...and ended up keeping my infantry from getting plastered by artillery. The American artillery, including the mortars, were really ineffective, aside from killing my Puma. It was due to the terrain and placement of the spotters, really. Our own artillery only killed with one stand, too, again due to little line of sight options.

We called the game as a German victory, which was fair as my Pumas were only faced my some mortars and HMGs, but all of whom were inside the wheatfield and no line of sight to me. One of our objectives was in that same field. With my infantry in good condition along the wall in front of the HMGs and with the Pumas on their flank, I doubt the American forces could have held that objective.

I am not a huge fan of Flames of War, but I will play when that is what we've got available. There are just too many things that don't "feel" right about the way combat and special rules interact and I really do not like the rules for aircraft, but again, it's a game and we all get to roll dice and "kill" toy soldiers!

Another Sun rises

Tuesday night's club game at the Crazy Squirrel was another Warmaster samurai game. This time, the scenario was a take off from one of the Mongol invasions of Japan. As Brent did not have any mongols, he substituted Orcs and Goblins. I, again, played the part of the Samurai, with Craig's clan as an ally, against Ron and Neils rampaging greenskins.
 This is the city...erm, battlefield. To the left, the oncoming psychotic fungi, having just arrived by boat. On the right, the honorable and righteous defenders of their homeland, having prepared a defensive position whilst the enemy was coming ashore.
 Turn one, Ron's force in the middle left failed most of its command rolls (a series of 11s) which boded ill for Ron the whole night. In my opinion, the this turn determined the outcome of the game.
Neil's mushroom lovers were mire successful in advancing on our lines. Neil's southern most command is in the center of frame, slightly shaped like an upside-down "L". My own troops are in frame at the lower right, with Craig's at the upper left.
 Unfortunately, the photo for the next greenie move did not turn out, but we do see my counter-move. Neil had advanced two archer units, with 30mm range, close enough to plink away at a unit of Craig's teppo leaving Craig to just sit and take the incoming fire. Neil accompanied these pesky troops with a sub-general. Oh, did I happen to mention that the invaders had more points than us as well has having seven (!) generals to our four!!

BUT, the photo above shows what happened to that general and those archers. My elite cavalry, sensing an opportunity, charged from behind our defensive lines and smashed into the archers. Unfortunately, I did not know (as the unit's abilities had changed from the last game) that I now hit on 3's and not 4's. Without this knowledge, my rolls did less than stellar damage, where I won the fight, but lost a stand...followed by a second round, where I lost another stand. However, I eliminated one unit of archers, seriously hurt the other...and killed that sub-general.
 My cavalry have consolidated their position. Here's what the table looked like at the beginning of the next greenie turn.
 And here it is after they finished moving. Notice the line of troops in front of my cavalry? Yes, they are ALL missile troops.
 Whose fire left my CinC all alone...and nearly dead (I had 1 hit remaining after all their fire, only to be recovered after shooting was done).
Here's Neil's oncoming horde. It looks disorganized, and it was, but that didn't matter as the lead unit was a large grouping of Ogres. No, not the nice Ogres from certain Hollywood movies. No, these were mean, nasty, smelly, and utterly ferocious ogres...and they swung deadly blades.
 The ogres crashed into Craig's line of troops, hitting a unit of teppo supported by ashigaru, that support was critical because the teppo were nearly eliminated, but due to support, Craig won the round of combat and chose (wisely!) not to follow up.
 Like a slow, unstoppable wave, the greenskins continue to advance.

Not much of a shot, but it does show the lynchpin between Craig's troops and my own. The unit in the valley, just below that grey rock, is Craig's unit, with the troops just down from it being my own. Those greenskins to the left are more archers...sigh.
 Ron's giants and greenies finally got stuck in.Yet, Neil's army is getting it's far flank turned by Craig's cavalry and two units of ashigaru, but not before the ogres hit Craig again, wiping out two units.
 Notice, there were three giants in the previous pic, but now their are two. I did five hits against the giant at the bottom of the previous frame, which then rolled higher than its basic move on five dice...meaning it ran off the battlefield.
 However, Ron got a big unit of orcs into my lines, pushing me back, nearly breaking open a hole. This pic is the AFTER, as I had lost 4 stands and Ron about 15 at this point. My household elite infantry are just visible at the bottom of the frame and the orc general that barely survived is on the far left (generals were on round bases). The CinC casualty had been picked up by this point.
Neil's army, turning to face the flanking troops...and the ogres, minus a single stand, have chewed through almost four units on their own. Craig's general (our overall commander) was down to a single hit...with Neil throwing every last goblin against it, but the generals survived...much to Craig's and my relief.

I thought I had taken a few more photos, but they are not on my camera (shrug!), but the final turn of the game saw me counter-attacking Ron's troops, and throwing them back out of my lines. I took one general down to a single hit, wiped out three units of orcs, and killed their CinC, ending the game with a narrow victory for our side.

I felt bad for Ron as his first two turns saw very little movement from his army and then his saving throws were practically all whiffed in the two final turns. I, myself, was only able to move two units the entire game, from command rolls, the rest of the moves were from initiative only. Both Ron and I rolled a fair amount of 11s all game.

This is the second game in a week where Neil came within one wound of killing our CinC and winning the game for his side, but he continues to be robbed of that victory. <grin>

Wednesday, June 27, 2012

Some guys have all the luck!

Ray over at Don't Throw a 1 has received 250,000 hits and is giving away a nice prize; he's painting up some of your figures for you!

Not only is Ray a nice guy, but so is his erstwhile companion in arms, Fran, at The Angry Lurker. Between them, these two gents have over 600,000 hits.

Where am I on this hit list?... erm...less than 6000.  I guess I am still the unpopular bloke in the corner, hoping to be noticed. :)

Well, grats to Ray, and a belated grats to Fran, as both are on the path to becoming internet LEGENDS....yes, LEGENDS!

Oh, and if you haven't already done so, see that blue "join this site" bar on the left side of this page? Yes, that one! Well, click it and follow me!!

Do it! It's my birthday today...so, as a present, follow me!

:) :)

I will have another blog post later; an after action report from last night's game.

Saturday, June 23, 2012

All hail King Pendraken!!

A few weeks ago, I was going through my Perrin 10mm Miniatures. I had purchased them almost ten years ago, now, and am going to use what I have for playing I Ain't Been Shot Mum, by Too Fat Lardies.

Well, as I was going through my German and Russian forces, I realized that I had far too many Russians with SMGs and not enough Germans with LMGs and HMGs. So, I went to the Perrin catalog online...and realized, that were I to build my forces using only Perrin, I would be missing a rather large chunk of equipment, especially early war stuff.

So, I asked around on TMP and folks gave me a few suggestions, the one which stuck out most was Pendraken. I went to the Pendraken site and was disappointed that much of what I wanted to see did not have photos posted for them. So, I emailed them and inquired.

Now, about three weeks after my email, I received, today, their 2012 Catalog and about $10 work of samples, the very eras I had mentioned that I had an interest in 10mm for, WWII and Ancients.


I must say that I am VERY pleased with the folks at Pendraken as well as their products. The Grant/Lee and PzII pictured above are well sculpted and have plenty of detail for this scale. While the infantry do have a slight amount of flash, not every figure is so affected and what is there is minimal.

Needless to say, when I can afford to do so, I will be placing a nice order with Pendraken. I may not be able to stop at just the two eras or four armies between them... these tiny soldiers are superb...and sell themselves rather well.

I have a feeling that the $10 of freebies will translate into a few hundred dollars of sales.

Nice going Pendraken!

Friday, June 22, 2012

A busy week, but games too!

Well, I had much to do this week, between digging a long ditch for my dad (literally) and possibly getting a summer job teaching remedial English (the only thing that may disqualify me is that while I am a grad student, I am not a grad student in the English department....but I write better than 3/4 of them anyways) I was able to get two nights of games in at the Crazy Squirrel.

Unfortunately, I do not have any photos of Tuesday night's Samurai game. We played a Warmaster variant, using Brent and David A.'s armies. There were five of us playing, three were my opponents and one was my erstwhile ally (he showed up very late while I was facing two people).

In this variation of the popular game, each side gets a pool of dice which they allocate to seven or eight categories. They roll for each category separately, with 4's and up being successes, with the goal of having more successes than one's opponent. The degree of success then correlates to advantages or potential advantages during the game.

Where I got lucky was with terrain placement. We dropped seven pieces of terrain, with my going first and last. My opponent, Ron, placed a forest right in front of my two small hills, after I placed a forest in front of his one hill on his right...my hills were also on my right and across from them, about 40cm away were two impassible and LOS blocking woods. Since I also won the terrain category roll, I was able to add, delete, or move a terrain piece. Yes, you guessed it, I moved the forest in front of my hills to right next to Ron's hill...leaving him two small gaps of about 10cm of open ground between the impassible terrain on his left and the hill flanked by two forests on his right. I figured this would bottleneck his army...and as it turned out, I was right.

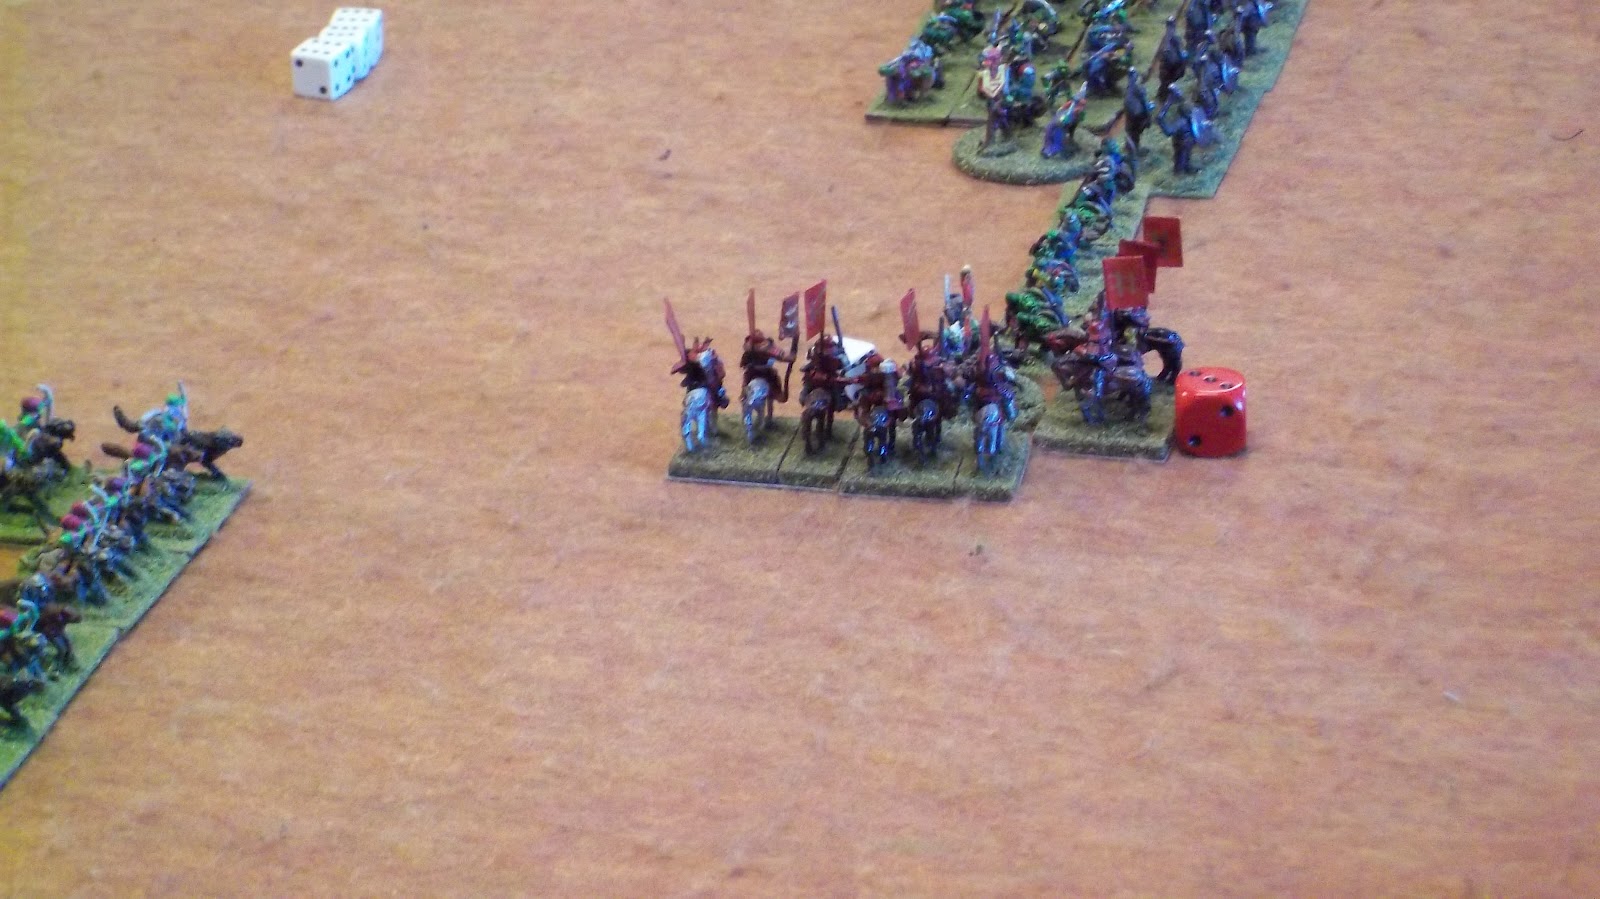
As nifty as the set up was for me, execution of my plan went awry on my first turn...as I blew my second command roll for my Elite Samurai cavalry which was brigaded with my two elite samurai infantry on my far right, which also had my general and sub-general with them to give extra umph in combat. I had left the rest of my army in a single line, archers on the hills, arquebusiers on my far left, with two units of Ronin warriors, Ronin arquebusiers, and a unit of light archers. I figured to cross my elites from my right to my left, in front of my hills, and let my archers do their thing using initiative. As the Ronin automatically attack using initiative, I figured I really did not need to command anything but my elites. Except, after I got in one move, I rolled a fecking 11, needing a 10 or less...leaving my nice tight unit of elites out in the open, in front of elite arquebusiers (who hit on a 3+), which I had intended to charge.

Alas, I end up losing a stand of my elite cav to those enemy gunners...and my battleplan went to hell.

The elite force ended up doing a 180 and went after three units of commoners, because to go forward was to get beat down by a lot of shootie gits. However, I did tell of my household troops and sub-general to deal with that mass of enemy coming in at my center, but who were out of range of my bowmen. My household troops bore in...and after several crappy rolls, they were beaten (due to enemy support bonuses) and were pushed back. Where they were immediately rushed by two units of spearmen and then flank charged by Ron's (Now under the command of Matt as Dave A. had shown up and Ron matched up against him with new units). Elite cavalry.

I was ready to throw in the towel at this point...my household troops were surrounded on three sides and I had nothing heavy to deal with any breakthrough moves.... Until Matt had a turn of crappy rolls. Out of 30 attacks against me... I took less than five hits, meaning I did not even lose a stand, dishing back more casualties against the enemy to my front...only to lose due to his damn support bonus. On their 2nd round of attacks, I did lose a stand (down to 1 stand and the sub-general) as the elite cavalry were the only ones to follow up, due to the limited space. I wiffed on my own attacks, leaving myself in a very very vulnerable position. His deadly cavalry within charge range of all my crappy troops.

On my far right, my elites were grinding away at the commoners, losing stands and killing stands..it was slow going due to my lousy rolls (but I did get a Yahtzee by rolling five 2s for saving throws...needing a 4+).

On my next turn, I pulled back the remnants of my household samurai and my sub-general and prayed that combined archery fire would do SOMETHING to the incoming meatgrinder of his cavalry. More bad rolls and I end up doing two hits....out of nearly 10 rolls. Luckily, he rolled a 6 for effect and was confused....I believe this saved me.

On my far left, the advancing samurai and my ronin went head to head...with my ronin ultimately dying, but only after taking out 2/3 of his own household troops. On my far right, my elites had finally ground down two units and smashed a third...but due to my bad rolls, it took two of my turns and one of his to eliminate it.

At this point, I only needed to kill 2.5 more of his stands to break his army, so I threw my second ronin unit and my sub-general in at 2 units of samurai. A bit of back and forth, and I killed three stands...but MVP of the game was my sub-general as not only did he lead the unit which did the kills I needed to win, but he also survived 8 attacks, 5 hits...of which I saved 1.....leaving him alive and causing Neil to shake his hand in fury... (it was THIS close!!!!)

To top it off. The Crazy Squirrel had a prize give away to anyone playing miniature games in the store that night, but you had to be present to win...and I won....this:

On Thursday night, we played Flames of War (only the second time I've played it, and the first with the new edition of the rules). The scenario was 1942ish North Africa and I selected to play on the German side.

 This is the city... or village rather...and you can see, apart from some unflattering visions of folks in the background ( I did not see the bum in the lens when snapping the pic of minis!) one can plainly discern the British forces as deployed. Each side deployed four of nine platoons (or equivalents) with the rest to come on as reinforcements.


 A fuzzy picture of six Bren Gun carriers...some artillery, and infantry.

 One of my two 88mm guns, the other is barely visible at the top of the frame, also in the orchard. They did very little all game....but helped in the very last turn!

 The German center and far right. The 88s on the hill killed one of the British artillery pieces on our first turn, and our own artillery did for a second gun.
A better view of my position. You can see my infantry prepare to leapfrog to the small copse to their front. Which then eventually became their graveyard....ehh.

 Um... for recon forces, these Bren Gun carriers are a bit....yellow? Which brings to mind one thing that I found very annoying with these rules... you cannot do anything to a unit that runs from cover to cover, while it is on the bounce. No reaction fire, not "overwatch" nothing but watching a swarm of vehicles scuttling around as though they were crabs on the beach, hiding from the sun.
 The Brit infantry on their far left, and a mobile AA gun.
 The mobile AA next to Ron's hands, by the hill, had just backed up after having an 88mm round sizzle through the air right by it.
 David A.'s PzIV rushing up to take a shot at another artillery piece, but missing.
Ah ha! The enemy artillery observer is spotted on the hill....but he quickly digs in and becomes worthless to shoot at.

 The view from my position...and a Brit aeroplane coming in for a bombing run; it misses.


Brent's gun carriers prove to be a suicidal nuisance. And his infantry, behind that cover, just plinked away at my infantry in the copse. You can see in the top picture that the gun carriers parked in front of  my position to bang away at my boys. I ended up destroying one and causing the crew of other to bail out.

The gun carriers end up taking out an artillery piece and an 88mm gun.
 "Here ya go! suck on this, ya git! As the joyous gun carrier crew are about to hear the heavenly choir from a front row seat!
 The gun carrier crew get back in...at the same time my infantry are obliterated by artillery. I lose five out of the size stands right there.
 Oh great...Shermans enter on my left front...and shoot at my 88s, but miss.
Our far right...another fecking fecker of a fecking gun carrier (thanks Fran for the word!) about to kill another 88.
 I made him bail again! But his commander came over to play..doing very much of nothing as my lads had gone to ground.
 You can see the remnants here...their C.O. and then the 2IC...all huddled behind the biggest rock they could find.
 "Zip! Zip!" Goes my two 88s and two Shermans brew up...no contest.
Their first wave of reinforcements come on the table...to face off against a PzIV, which then takes out two of them...the third being bogged down in soft sand.

And the very last turn, due to time, our first group of reinforcements enter the table on my left, and flank the surviving Sherman, whose crew quickly join their mates in Valhalla....as it was shot at by 2 PzIVs and 3 PzIIIJs.

Nice game... for a change...:)