Monday, February 15, 2021

The Strategic Layer - botting the campaign part 3...A Campaign Design Process Update


This is a portion of the very beautiful map from the most excellent game, Friedrich, which is my favorite boardgame. It can be very difficult and frustrating to play, but it has all the elements I look for in a multi-player wargame.

This is the type of map I have in mind for my own Imagi-Nations campaign, but obviously mine will look very different. However, the point to point movement along minor or major roads is exactly the look I am wanting to capture.

With this snip from the map, I want to better illustrate by example my current working version of the "bot" for controlling enemy movement and the fog of war that the player has to deal with.

I have reworked a sample of the bot in action. I call it a "bot" as it resolves what I think a general high command would face if their country was invaded, without the player having to make a lot of decisions for the enemy side, ones which would have a built-in bias on the part of the player.

Nearly everything shown in the example below has a table or chart to go along with it. I just need to reword my notes and write actual rules for it all. I also need to clean up some of the tables as a few things have changed since my last couple of posts.

One thing I still need to work out is a matrix of possible outcomes as a result of a scouting/main body clash; the axis are accurate and complete information vs no information obtained and no combat losses vs scouts eliminated. I am factoring in the quality traits of the enemy commander in the given main body, but need to work out the various outcomes along both axis, assigned to d6 rolls. This will take some time to get working as I'd like, but the remainder of this bot example currently exists, if in a slightly muddy form.

The above legend applies to all of the images below. These symbols were created using Google Drawings, which is far more easy to use than GIMP 2.0, for very basic illustrations.

The player city really means town, city, fortress, capital city. I needed to designate them for this example, as they do not already exist in the form I needed on the Friedrich map. My own campaign map versions have had a variation on this from the very beginning of the project, some ten years ago.

Player forces can be as small as a battalion, but will usually be a brigade or more in strength. These are designated, in location and strength, by the player during the Winter Quarters phase. Enemy depot locations are diced for, as to number and location, also.

The player scouting forces are each one cavalry squadron (of any kind, heavy, light, dragoon, hussar, etc.). For this example, I purposely went conservative, using only a portion of the available cavalry, keeping the majority intact for battlefield purposes. More scouts is better, but these are mostly lost to the player for any battles between main forces.

The above is the situation at the end of the Winter Quarters phase of each campaign year. The very next campaign turn is the start of the year's campaign season, which can last from 6 to 28 weeks, depending upon the weather for that year (random die rolls). I've gone through a number of histories of past wars and felt this was a good enough spread that had a basis in reality. 

Below are the various maps, most with annotations that explain everything that I'd otherwise write in text here. The image just below is the end of the first turn, each following image is the end of each subsequent turn, through the end of turn 6. 

I realize these are small to look at here, but clicking on the images should increase the visible size.


 There is a bit more work to do, especially fixing the names and tweaks here and there, but I am fairly happy with how things turned out so far.

I very much would like some feedback on this. Other than a few friends who've texted with me about this or sent an email, I've nothing really at all from folks I do not know and/or have not gamed with. It could be that this seems as promising to others as it is to me, or that it's DOA in the minds of nearly everyone else.

This is something I want to take into account, especially as I do plan on sharing the end product, if people have an interest.

I have just learned that Friedrich, and its companion game Maria, are both getting an expansion. The expansion provides a fifth deck of combat cards as well as little labeled boxes and wooden pieces to provide for hidden army strengths. While I may never play either game again, due to now living a fair distance from any other wargamer, I still had to place my pre-order, just in case life and good fortune provide a way.


Saturday, February 13, 2021

The Strategic Layer - botting the campaign part 2... A Campaign Design Process Update


A short post, so that I can clear my head enough before bed. The way I think, if I do not get the stuff written down, I either forget it, all of it, or it bounces around so much that I cannot get to sleep. This bit has been bouncing around all day, so I needed to put it into Excel and post it.

Whenever a market is placed next to a population center, such as a town, city, capital, or fortress, at the start of the following campaign turns, another marker can be placed, if the opponent is legally able to do so. Thus, as long as the rule still applies, that a marker is to be placed adjacent to another marker, then additional markers can be added over time until the maximum of five is reached.

Main body markers can never be added to, only possible enemy markers. (I really do either need to change the name or just abbreviate them).

When a friendly force, whether scouting (cavalry) or main body, moves adjacent to a possible enemy marker, it immediately attempts to resolve the marker, into an enemy main body. 

This represents one's scouts trying to locate the enemy force, by physically exploring the area, talking with the locals, questioning a friendly spy, interrogating deserters, etc.

To complete this resolution process, the player rolls 3d6 and locates the column with the searching entity, which can be one to three squadrons or different-sized population centers, and then the row that matches the number of possible enemy markers in that location. If the modified sum of the dice is equal to or less than the target number, the possible enemy marker is removed and replaced with an enemy main body marker. If the modified sum is higher than the target number, remove all possible enemy markers from that location.

If the main body is revealed, it will immediately attempt to attack the scouting force or assault/besiege the population center. This means it is a bad idea for a player to allow these markers to build up.

It is possible, although a bit rare, for a second (or more) main body to be found, after the first. 


Except, that a friendly cavalry force, but not the main body, has to test first, to see if it has beaten back either the enemy screen or survived the various hazards they might have encountered, whether it be enemy scouts, unfriendly locals, obstacles and natural hazards, or even the weather. If the unmodified roll is a 17 or 18, the friendly force takes some SP losses to one or more of its squadrons (player's choice...or roll for it). Otherwise, if the modified result is greater than the target number, the scouting force takes 1SP loss from attrition or enemy action and does not attempt resolve the possible enemy marker that campaign turn. 

Historically, screening and scouting forces were "used up" during a campaign due to exhaustion and attrition, in addition to any battlefield casualties they might have taken, and thus this table reflects that. A player can shepherd their cavalry, but still risks losses, at the same time they may allow more possible enemy markers to spread across the map.

Again, this is a 3d6 roll, with modifiers. A success means the enemy marker(s) can be resolved; failure means the friendly remains in its current location and the possible enemy force marker remains in place, possibly receiving an additional marker at the start of the next campaign turn. Reminder, or maybe an FYI, a friendly scouting force attempts to resolve adjacent enemy markers only; main bodies attempt to resolve any enemy markers they are adjacent to.

Instead of rolling for the skirmish result, a tabletop skirmish can be played instead. If the player wins, they can attempt to resolve the possible enemy marker. If they lose, then the force takes losses.

As with all of my tables, these are works in progress, so it is very possible I may adjust the numbers. However, these are working models of what I am in the process of designing now.

Also, things do change when it is the player's nation that invades another. More on that in the future.

Again, I really would appreciate some feedback on this process. Also, anyone should feel free to test this out for their own purposes and see how things go.


The Strategic Layer - botting the campaign part 1...A Campaign Design Process Update


This image, among many others from this series of atlases, is what inspired me to want to run miniature campaigns of this nature, nearly 30 years ago.

 I must preface my post here by stating that I've yet another of my migraines, which first started yesterday and has intensified in the past half-hour. However, I need to get the below out of my head else I cannot relax.

What follows is a general idea that I have been working on, changing, re-working, and so on since about June of 2020. There is quite a lot to it, but most of my notes are short-hand with no meaning without context and the graphics as sub-bar for any standard. 

I own Campaign Cartographer 3, but have never really worked with extensively, although I did create the first two versions of my campaign map with it, but which were then lost due to harddrive failure. I'll be going back to that at some point, but as it kept crashing for an unknown reason, it became a frustrating process. Therefore, I went to work in GIMP, which was, to be honest, a mistake as that is a total PITA to work with. 

Therefore, please forgive the crap drawing that I am using to illustrate what I write below. BTW, due to the number of images, it is a long post.


 The Strategic Layer

The strategic layer for the campaign is made up from several elements, which each works with and influences the others in some way. Politics, economics, religion, records of past conflicts, and especially the campaign map all have their parts to play within this Imagi-Nation campaign.

One of the key aspects that I am attempting to simulate or model in something more than a completely random on haphazard way, is how a friendly military force would have dealt with an invader, above the battlefield itself. 

In modern times, satellites, radios, television, drones, and the cellular phone are all brought to bear in spreading word about movements of enemy forces, not the least of which being "news broadcasters" who either accidentally or purposefully give the enemy forces information that should be denied them (the BBC in the Falklands and nearly all news sources in Desert Storm, being two examples).

In more primitive times, usually the first sign of trouble was when word of refugees running in terror was heard, somewhere from a border area.

It is here where I wish to begin and create a system that, while random, has some reasoning and "realism" behind it. 

At the start of the campaign season (more about this later), possible invasion/entry points from the enemy nation are marked on the campaign map. This marker, also known as a "main body" marker differ in appearance from the "possible enemy" marker.

The wooden markers pictured above would be examples of what might be used. I have several differently shaped wooden pieces, in red and blue, but I am looking to add a few more for future testing.

At the end of the first campaign turn, a possible enemy marker is placed in each friendly location connected by road to an enemy main body. At the end of each subsequent campaign turn, a possible enemy marker is placed in the friendly country in every location connected by road to either an enemy main body or possible enemy marker.


Here, we have a lousy map that I drew in GIMP. There is a river running from southwest to northeast, separating Nation Red from Blue Nation. This is at the start of a campaign season. The blue marker is the current location of a Blue Army just finishing its mobilization after winter quarters.


At the end of Turn 1 of the year's campaign, Nation Red chooses to invade Blue Nation and so possible enemy markers are placed across the river in the locations connected to the Red main bodies by road. Blue Nation foolishly did not guard the river crossings. 

Turn 2. Blue Nation's main body is hearing rumblings of enemy activity, now that some likely enemy scouts or raiders have moved adjacent to its main body. Had Blue Nation sent out its own pickets or patrols, it would have learned about the enemy in the previous turn (each turn is approximately one to two weeks in length).

Turn 3. Blue Nation has taken action, finally, by sending cavalry to try and locate the enemy main body.


 Turn 4. Blue Nation's cavalry has successfully cleared the locations, either it was just a few enemy or simply false reports. Although, they COULD have found an enemy main body advancing quickly upon its objective, the location with the three stars. Blue's main body has also moved, anticipating the enemy to head to the port to the northeast, where much loot could be gained as well as stores and other supplies.

Turn 5. Blue Army's main body has discovered that there were no enemy in its present location and the adjacent friendly cavalry realized they'd been sent on a wild goose chase. Meanwhile, the other Blue cavalry patrol ran into the the enemy main body and recoiled. It was either that or be destroyed or captured. 

Turn 6. Blue's main body decided to let its cavalry rest, hoping the enemy would approach it. However, Red's true objective is not the coastal port at all, but the city to the southeast. Note, a possible enemy marker has been placed where the main body once stood. There could be a supply caravan or other enemy troops there, or nothing.

Turn 7. The Blue cavalry attempts to delay the enemy main body, but fails and it falls back to its city. The commander of the Blue main body realizes he has made an error and force marches his troops back to the city, leaving cavalry behind him, else the enemy may cut him off from the port.

Turn 8. Blue wins the battle, decisively, capturing many of the enemy forces. It immediately advances in pursuit, but the enemy's escape is cut off by the cavalry who capture the crossing location and who harass the Red main body to where they capitulate.

Turn 9. There are still some likely enemy raiders around, so Blue continues to mop up and scout for perhaps a second main body. The likelihood of more than one main body depends upon the political decision of Red, either to skirmish/harass, raid, reconnaissance in force, or invade. This "invasion" turns out to be a mere reconnaissance in force.

Turn 10. Blue's cavalry has cleared the countryside, with no additional Red forces found. Normally, a red possible enemy marker would have been placed in the river location that the blue cavalry has just vacated, but no possible enemy force markers may be placed in a location between two opposing markers, at a bridge crossing or mountain defile, it would  have to be a main body marker, instead. However, Red has had enough for this year and does not advance its forces.

Blue Nation consoles itself in victory, the Blue commander being glad he was not sacked for incompetence...yet.


Now, this is what I want to do with my system, creating one which provides for the above. I've decided how I will do it, now I just need to create the actual mechanics, with the numbers and possible outcomes.

One thing that did not show up in this example is that friendly towns and cities will attempt to "clear" adjacent possible enemy markers (through patrols and such), but cannot clear enemy main bodies. If the friendly town is then covered by a possible enemy marker, though, it cannot make any attempts to clear them, as it "might" have actually been captured.

Also, fortified cities and fortresses will have an additional possible enemy force marker placed on them, each campaign turn, indicating a good chance that an enemy main body is actually there, laying siege to it or otherwise preparing an assault. The more possible markers present, the greater chance the enemy main body shows up, which means it may well be too late to save the city.

Also, there's always a chance that an enemy main body may be in the location of a possible enemy marker, either there's nothing, a small scouting force, a raiding force/cavalry patrol, or a main body. The closer the marker to a friendly location, the higher the chance the enemy shows up nearby.

Much of what I have written here is in note form only, but I've created other illustrations, which I did to show a friend what I was working on. The system is mostly all in my head and I need to begin the writing of it, in addition to creating the various matrices that will help to resolve the campaign movement.

Primarily, I want to avoid the player's knowing everything, in this case the player is just me, but in case someone else wants to use something like this, I do want to be clear and open about how things work and why.

I would really appreciate any comments or thoughts on this, as I am open to the fact I may have left something out of my thought process or may not have fully considered the idea's complexity or whatever.

The charts and matrices will be my weekend project, should my migraine lessen up enough for me to think more clearly.

Tuesday, February 9, 2021

Resolving Combat Part 3...A Campaign Design Process Update


 As I was pondering the issue of the combat mechanisms within these modified rules, in addition to the new results table and die roll mechanic,  I also considered the following:

[After an email from a reader, I realized I had left off explaining the ranged results column and have therefore edited this post to add it in. Added text is in blue.]

Melee

Score

Melee

Results


42

+ Surrender

36

+1 SP Loss

30

+ Retreat

24

+1 SP Loss

18

+ Retire

12

1 SP Loss

6

Disordered


Ranged Score

Ranged Results

36

+1SP Loss

30

+1SP Loss

24

+1 SP Loss

18

+Retreat

12

+Retire

6

Disordered


With this method, I keep to the one set of score numbers, which is something I prefer as it makes determining combat results a quick and easy job once the order of outcomes is memorized; with all results requiring a multiple of six, this becomes a breeze.

The ranged results table do differ from the melee table, because I do like how Warmaster handled it, twenty years ago. Significant bombardment will still dish out lots of casualties, but skirmishing or light bombardment will serve to discomfit or annoy their targets, rather than destroy them. 

As technology improves, then adjustments of results, by shifting up or down, will serve to cover the relative lethality of artillery. 

Where the differences in results for winners vs losers of a given melee would show up is that the winner gets a up one shift modifier on the results column. 

There would be other modifiers, of course, for terrain, condition, etc., that would either adjust the result up or down by one each.

The only modifiers to the number of dice rolled would be from any special units applied to the unit in question; the possible exceptions might be for shaken or disordered units, both receiving a -1 combat die, but testing will likely decide that.

The top two results on the chart would be very unlikely outcomes, but still possible within the realm of the game, unit characteristics, special rules, artillery support, and result shifts.

One other option (let's call it "Option 4") I considered was to roll the dice, cancel matching dice between opponent rolls and then any remaining dice would be rolled for hits, with infantry needing a 6, cavalry a 5-6, and artillery a 4-6, with units being disordered on the first hit, the second causing a -1 SP loss, the third a retire, the fourth another SP loss and same for the fifth and sixth. However, gaming it out in my head, I feel the units would be far too brittle and the game end with massive casualties for one or both sides.

Of all of these, I am liking Option 3, before any further testing, of course; one set of numbers and outcomes to remember, modifiers generally shifting results up or down, and special rules possibly adding to (or taking away from) the number of combat dice rolled for a unit.

The more I think on it, I the more pleased I am with it.


Resolving Combat Part 2...A Campaign Design Process Update


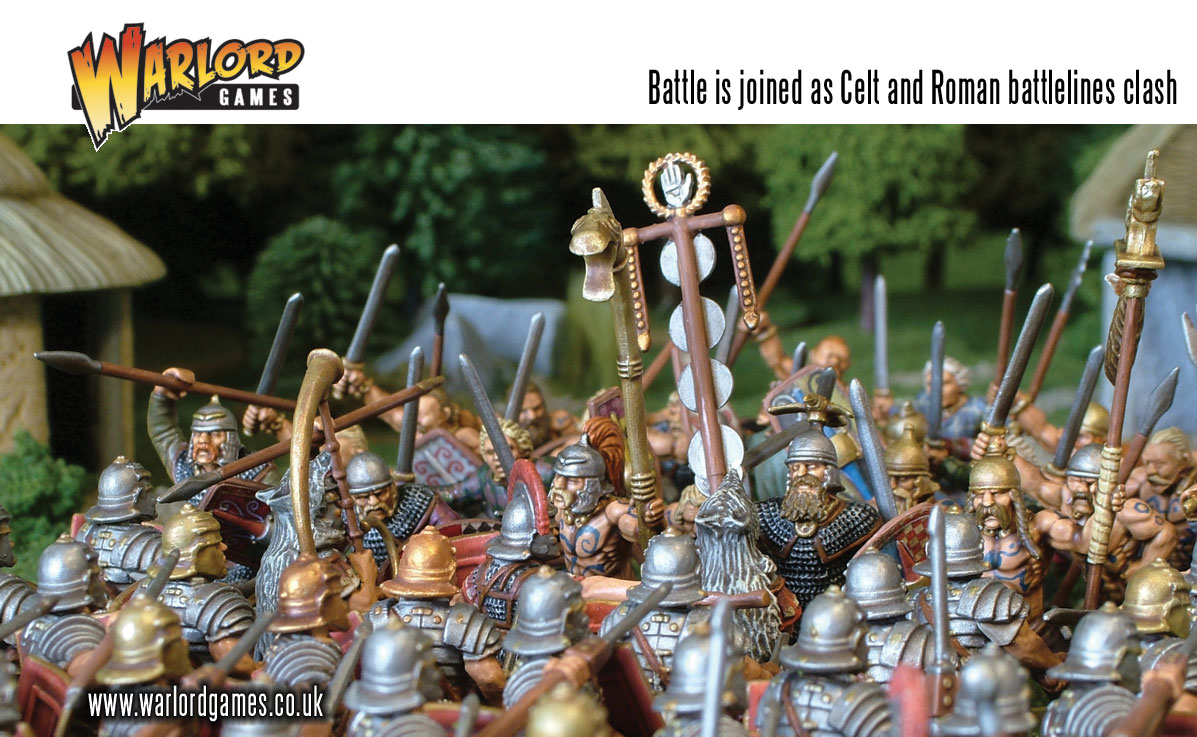
                                    [I do like Warlord Games' images of painted miniatures.]


I continued to suffer from internet connection issues over the weekend, unfortunately, but that did allow me the chance to go through a number of packing boxes, to sort out what's what, as well as playtest and re-think the combat a little bit.

Winner

Melee

Score

Loser

Melee

Score

Melee

Results


Ranged Score

Ranged Results

28

42

+ Surrender

35

+1SP Loss

24

36

+1 SP Loss

30

+1SP Loss

20

30

+ Retreat

25

+1 SP Loss

16

24

+1 SP Loss

20

+1 SP Loss

12

18

+ Retire

15

Retreat

8

12

+1 SP Loss

10

+Disordered

4

6

Disordered

5

Retire

It got to where I was rolling far too many dice in a single round of combat, between two units. I figured, early on, that this would become tiresome, but I played through it, to see where things would go wrong or would cause me to not enjoy the mechanic.

These process posts are intended to show my thoughts as they progress, not present merely a final version of everything, btw.

Now, I am looking at each side rolling their combat dice at once, matching dice cancelling each other out and the remainder per side added up to give a winner and loser.

Instead of rolling defensive dice as an additional die roll, Grit and Gear (plus modifiers) is subtracted from the sum of the dice, before the results are determined.

So, the dice rolled, same die scores cancel each other, the remainder are summed, the higher scorer is the winner, the Grit and Gear value subtracted from the total, and then each player matches their score with the appropriate column on the results table.

For the results, each result is inclusive of the results below it, thus the "+" symbol; a winning unit which scored a 17 inflicts disorder, 2SP losses, and a retire result on its melee opponent, for example.

As a consequence of this change, the special rules will need to be re-addressed, so that the conform. Additionally, I am looking at adjusting results by shifting them up or down the column, due to cover, fortification, formation, modifiers OR instead, the Grit and Gear score is modified, such as +2 G when unit is in woods, +3 when in hasty works, +5 when in field fortification, +9 when in a fortress (numbers are examples).

Artillery dice, when used as offensive or defensive support, cannot be canceled. Bombardment dice are never subject to being canceled, only their sum reduced by G.

I will be testing this out during the week, and will take some photos of my testing table.

Note: the Blue text was added several hours after originally posting.