Showing posts with label WSS. Show all posts

Wednesday, July 4, 2012

WSS Wargames Factory Troops: WIP

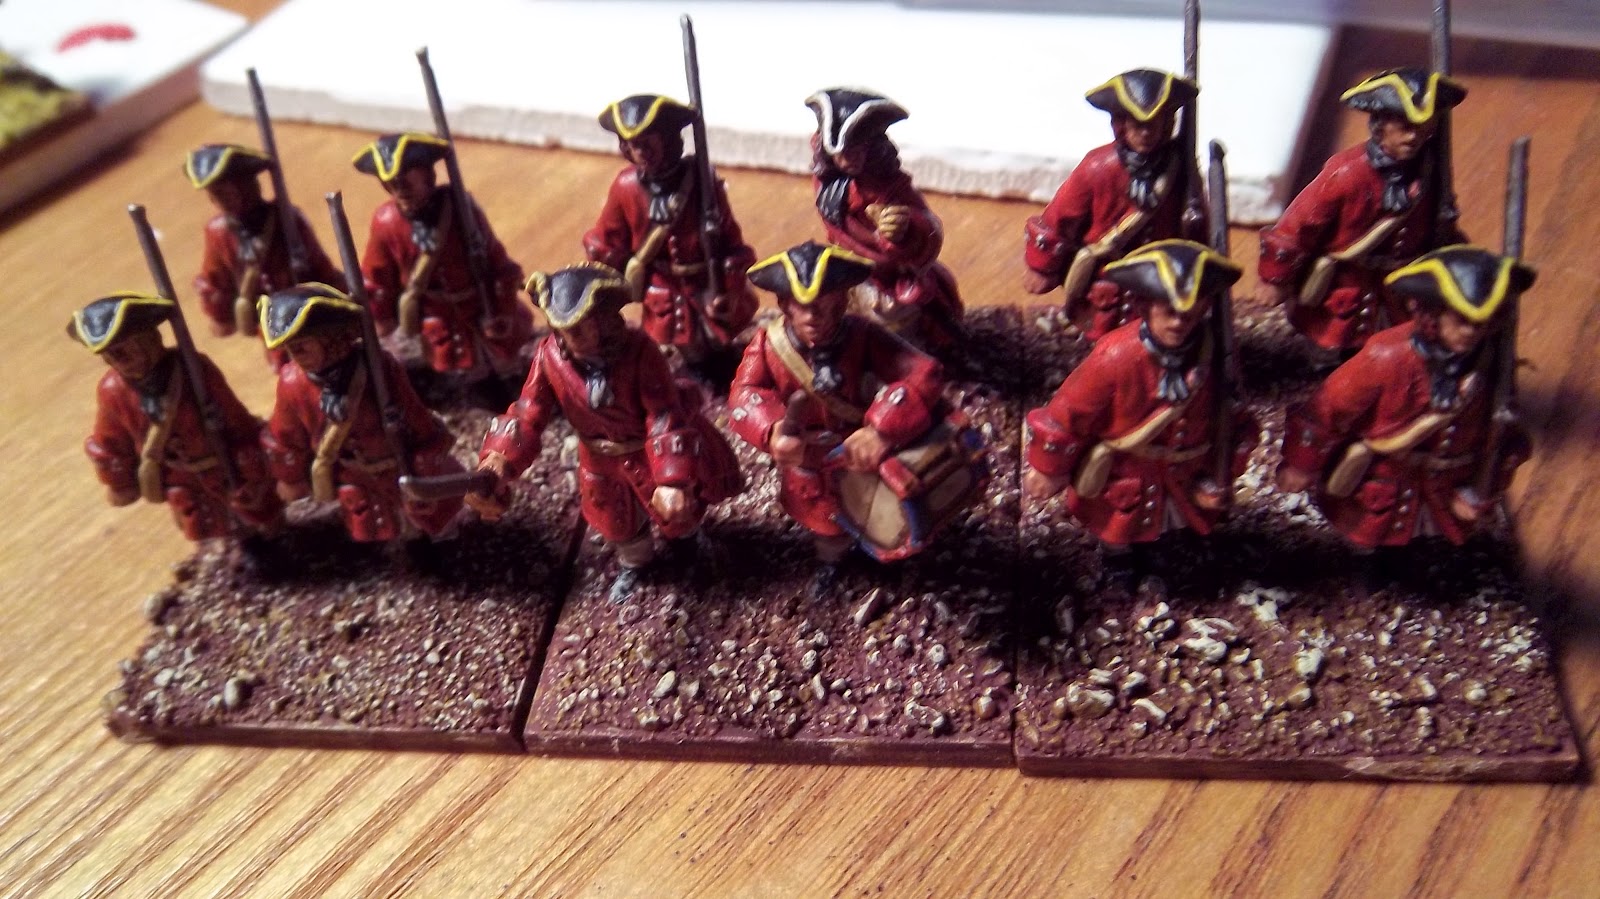
Well, they have been long in the works, but I am nearly done with the first of several battalions and squadrons of the Wargames Factory infantry and cavalry boxed sets. These have been painted for my imagi-nation campaign army, but they are meant to be also used as British soldiers in the WSS.

 As I am using the plastic infantry to give me as many 12 and 16 figure battalions as possible, I purchased a few Front Rank and Ebor Miniatures ensigns to be my battalion standard bearers. Of course, the Front Rank figures are really too bulky, but as I place the standard bearers in the back rank, they are hidden by most of the battalion.

The above and below shots are meant to show how the figures looked after I brushed on the Army Painter strong tone dip.

 This is the front of the model pictured above. Notice, I did not do any detail on the face at all. I was following the "Army Painter method" for quickly painting armies, just to see how they would look. Note: The Army Painter dip does not forgive or hide bad paint jobs. If you leave behind errant brushstrokes of a differing color, they will still show up. Only if the mis-painted area is in a crevice will the dip be dense enough to cover the paint beneath. Also, if you highlight the area before using the dip, the highlight does show up nicely.  If you find that there's just not enough dip on an area, let it dry for at least 8-12 hours before applying another layer...otherwise the first layer is too tacky and you get a bit of a globbed on look, like on the lower part of the waistcoat below.
 Here is a bit blurry pic of a second ensign, both this and the previous one are from Ebor Miniatures...which I am very well pleased with (with a single proviso). I applied the dip with a brush, but purposely did not brush off any excess, I just put it on a but thick and let gravity do its thing. I felt and still feel that these chaps would be dirty after a long march and the strong tone is a good color for muddy and dust encrusted uniforms.


 The nearly finished units (I need to do two stands of pikemen and the actual regimental standards, before I can call them done). This is the shot before I started basing them.
 The base on the left after I applied DAS clay. I wanted to not have the plastic bases make everything look odd and the DAS will keep the figures attached to the base better than just white glue. On the right, you can see a base which has had the next treatment, a covering of watered down white glue followed by a gravel and sand mix.
 After the eight bases of figures dried, I then went and thickly painted on a watered down brown craft paint that I bought at Wallyworld for $.57 for 2 fluid ounces. This saves me on using GW Scorched Brown which is far more expensive. On the right, the base has been drybrushed with GW Snakebite Leather.
 Next, GW Bleached Bone as a lighter highlight.
 Followed by Gale Force Nine's Summer Flock mix.
 With some Army Painter flower tufts glued on. I did not have the right kind of tweezers for this and the flowers got a bit squished.
File:Twee... is what I used. is what I should have used.
 As close as I can get and still maintain focus on the bases, you can see the flowers a bit better here, both yellow and white.
 My digital camera is not very good...I cannot do more than use various pre-sets with it, so I am very limited on how close I can get, I cannot change the depth of field, nor the aperture setting. So, these pics really do not do justice to the models.
 A squadron of horse.
 The Wargames Factory plastics do lend themselves to quite a bit of easy conversions. The officer here has had a major arm conversion, showing him in the process of waving his men forward with his sword.
Two battalions from the same regiment of my imagi-nation army, but painted according to two different historical British battalions' supposed colorings.

I have eight pikemen, six dragoons and their horses, twenty-two infantry plastics, two metal ensigns, two metal infantry brigadiers, one cavalry brigadier, and one "army commander" currently on my painting table. Some of these are already primed or even mostly painted, the rest will get primed tomorrow. I need to get at as many done as I can in the next week as I am putting on the next club game using Beneath the Lily Banners 2nd.

Thursday, February 23, 2012

Wargames Factory: WSS Cavalry Review


Due to my computer hardware problems, I was not able to post this four months or so ago. I finally got some time to assemble these figures over the long weekend, this past weekend, and I decided to go ahead and post a review.

The sprue is not as well laid out as the infantry sprues, in my view. There is plenty of space between the three arms with pistols, to the front right, and also next to the three dragoon muskets on the front left. Additionally, there is space next to one of the leg pairs, just above the arms with pistols. This is unfortunate, because I really feel there are some missing bits that would have been very helpful for this box, namely more arms with open hands, floppy hat heads, and a torso with breastplate only.

There is only a single open handed right arm on a sprue, which limits the number of poses you can have in a unit, beyond a trumpeter and standard bearer. Of course, we can convert models easily in plastic, especially if we have a number of infantry sprues handy (which I do!). However, I feel it is very short sighted to have just the one arm to cover the command crew and dragoons holding muskets.

During the WSS, and before, floppy hats were the norm. It was during the WSS that the brim of the hat was folded up into a tricorn style. This means one MUST have the infantry sprue in order to use the single floppy hat head found there, which does not have a field sign. I hope WF eventually (as in SOON!) does an artillery box. If they do, I hope to be able to request floppy hats on the crew sprue.

As wearing armor was going out of style during this period, it seems reasonable for there to have been a torso with just the breastplate.

These are really the only quibbles I have with this box.


Well, that is not true. I am also disappointed in how the legs of the horses do not have 3 points of contact, or even two solid ones, for all the reasonable variations a single box can produce. One horse, if assembled this way, is rearing on its hind legs OR with tilted to a more horizontal position, can be said to be jumping an obstacle.

Again, If the artillery box cones out, I would like to have caisson and crew, with the gun. This should include a pair or quad of horses. If so, they need to go to the expense of doing another set of different poses for the horses.

Okay, now my quibbles are exposed.


I do like the box, very much. The price point is something that makes my wallet happy. The actual box construction is far sturdier than the previous boxes, with a top and bottom instead of side openings. This means I can now store pieces, completed models, or even fully painted and based units in the box they came in. Much much much better than before!

For making 12 cavalry models, there are a great many options one can choose from. There are 3 back and breast torsos, with 3 lobster helm heads, per trooper sprue, eight tricorne heads, and six felt hat heads (2 different hat styles - maisson du roi is one). Since the infantry sprue heads easily swap with these bodies, you can actually do a lot more with these, including having horse grenadiers!

If you are building an army for an imagi-nation, then this box set really gives you options, which increase exponentially when added to the infantry box. In fact, one can do infantry with lobster helps and armor, which could be used for engineers. If only the infantry had gaitered legs, then one could do dragoons properly (by having a stand of foot dragoons for when the unit dismounts).

Improvements to this box over the infantry box include the corrected sword (hilt now faces the proper way), pistols, extra extra muskets, and a trumpet. Where it falls down a little is the lack of a standard pole (but I can use the extras remaining from an infantry box, or wire).

Since I am building units of dragoons for my own imagi-nation (also blogged on through Blogger)at three to a base, I made a drummer instead of a trumpeter. Both he and the standard bearer have muskets slung and the rest of the dragoons are using both hands on the reins, with muskets slung. Meanwhile, my horse are armed with swords and only two to a base as my bases are 50mm square. This gives me one squadron of dragoons and 1.5 squadrons of horse, per box; three squadrons of horse per box is the alternative. My imagi-nation cannot recruit cuirassiers locally, so they will have to try to acquire allied units of those heavy horse troopers. Thus, one or two boxes will sort that for me, completely.

The assembly of the horses is straightforward and simple. Using a little plastic glue, and things go well. There is little in the way of mold lines; nothing a sharp hobby knife cannot handle. As for gaps, there is a slight gap around the base of some of the horse heads. This may be due to the heads going to specific pairs of legs, but maybe not. Anyhow, the gap is not large and can be filled with the plastic glue or a tiny tiny amount of putty. One thing I do suggest is to drag a sharp knife across the rump and saddle of the assembled horses, to knock down any flash (there wasn't any on my 36 horses) and to even out the two sides of legs.

The trooper's legs come in two parts, one for each leg and thigh. This can be slight fiddly as the tab allows some "wiggle" at the join in the middle, so I suggest you have a horse assembled and then fit the assembled legs to it, before the glue dries, to make sure of a proper fit. Just take the legs back off before they get glued to the saddle.

There is a larger gap between the top of the legs, where the upper torso is glued to the waist. This can also be a problem if the torso is aligned off center from the front facing of the model. This being the case, your arms will be in the wrong position and you may have to remove the torso and re-glue it. As far as the gap between upper and lower portions of the trooper, it is not very noticeable once they are in the saddle and the bag and blanket/coat are glued behind the saddle frame.

It does look like one of the tricorne heads was taken straight from the infantry sprue, which means it has bugged out eyes. The newly sculpted heads do not have this problem. So, if this look is something you want to avoid, pay attention to which head you are using.

My only other wish for this box would be to have a sword scabbard sans sword. When gluing the sword scabbard to the model, if the model has a sword in its right hand, then you have to cut the hilt from the scabbard piece. Otherwise, it will look...wrong-ish. Again, a sharp hobby knife sorts this. Oh, another thing, the sash bow piece is the same from the infantry sprue, but it flows the wrong way for movement. It is not a deal breaker, but it is a detail that sticks in my mind...because it just does.

Overall, I do recommend this box for purchase, especially to those collecting for imagi-nations armies.